Showing posts with label new blue house. Show all posts

Monday, January 13, 2014

Some of my (new) Favourite Clean Eating Sites

Hello World! =)

So, eating clean is a bit more thought provoking but so worth the little extra effort it takes.

Here are a few of my newest favourite clean eating sites:


Tuesday, April 23, 2013

A Little Spring Cleaning

Need some Motivation to get those cupboards ship shape?

Here's what I have been working on the last little bit. I have found that since I have no control over some major things in my life…(see My Story if you don't know what I am talking about), that cleaning gave me some sense of control. Until the kids come home that is! Organizing my cupboards has been some more therapy. I listen to songs that let the tears flow, or uplift my spirit, or just get the cleaning "juices" flowing. You know what I am talking about. What's your favourite "getcha going" song?

So, welcome to what was my mess. (I am pretty sure my Mom or Grandma said "Don't air your dirty laundry", but what about my drawers? =)

Firstly, what I did was take pictures on my phone of the area(s) I was working on. That way when I went to the store I did not have to rely on memory to figure out what I had and what needed organizing.

Secondly, find your containers. If you have baskets, storage boxes at home, great! Use them! I did not. So off to the dollar store and Ikea I went. These places seemed to have the most inexpensive storage solutions.


Thirdly, now -  pull everything out! (I like to finish projects before going on to the next. If this is not you, then I strongly suggest you only take out what you can tackle in the amount of time you have. i.e. - an hour, all afternoon, etc. Try not to bite off more than you can chew. That will only make you discouraged.)

Fourthly,  GET EXCITED! You've got the tunes on, or the baby is sleeping. This time is yours. WHEW! And what an accomplishment it will be and you will feel so put together when it is all done.

Now, get those piles in order. Blue bag for recycle,  another bag or box for give away and lastly a garbage bag for garbage.

Lastly, CLEAN - wipe down the cupboard/shelf/drawer etc.

BEFORE
(Organizing my bathroom cupboard)


Try to put like items together. Things that get used the most. Find a filing plastic container for your important papers. Memory boxes. (remember, don't keep everything. Not everything is important. When Brian died he took NOTHING with him. At first, everything seems important, but let it go. Try to keep only a few memorabilia of your past. Truth is, you'll maybe look at it every other year or you may forget you even had it to begin with.)


AFTER

I forgot to take a before picture of my pantry, but here is the end result.

(see where we ended up putting our growth chart? Even Grandma's and Grandpa's are on it!) 


(Because our food needs change, I think I will re-organize this pantry far more often than I have in the past.)

BEFORE

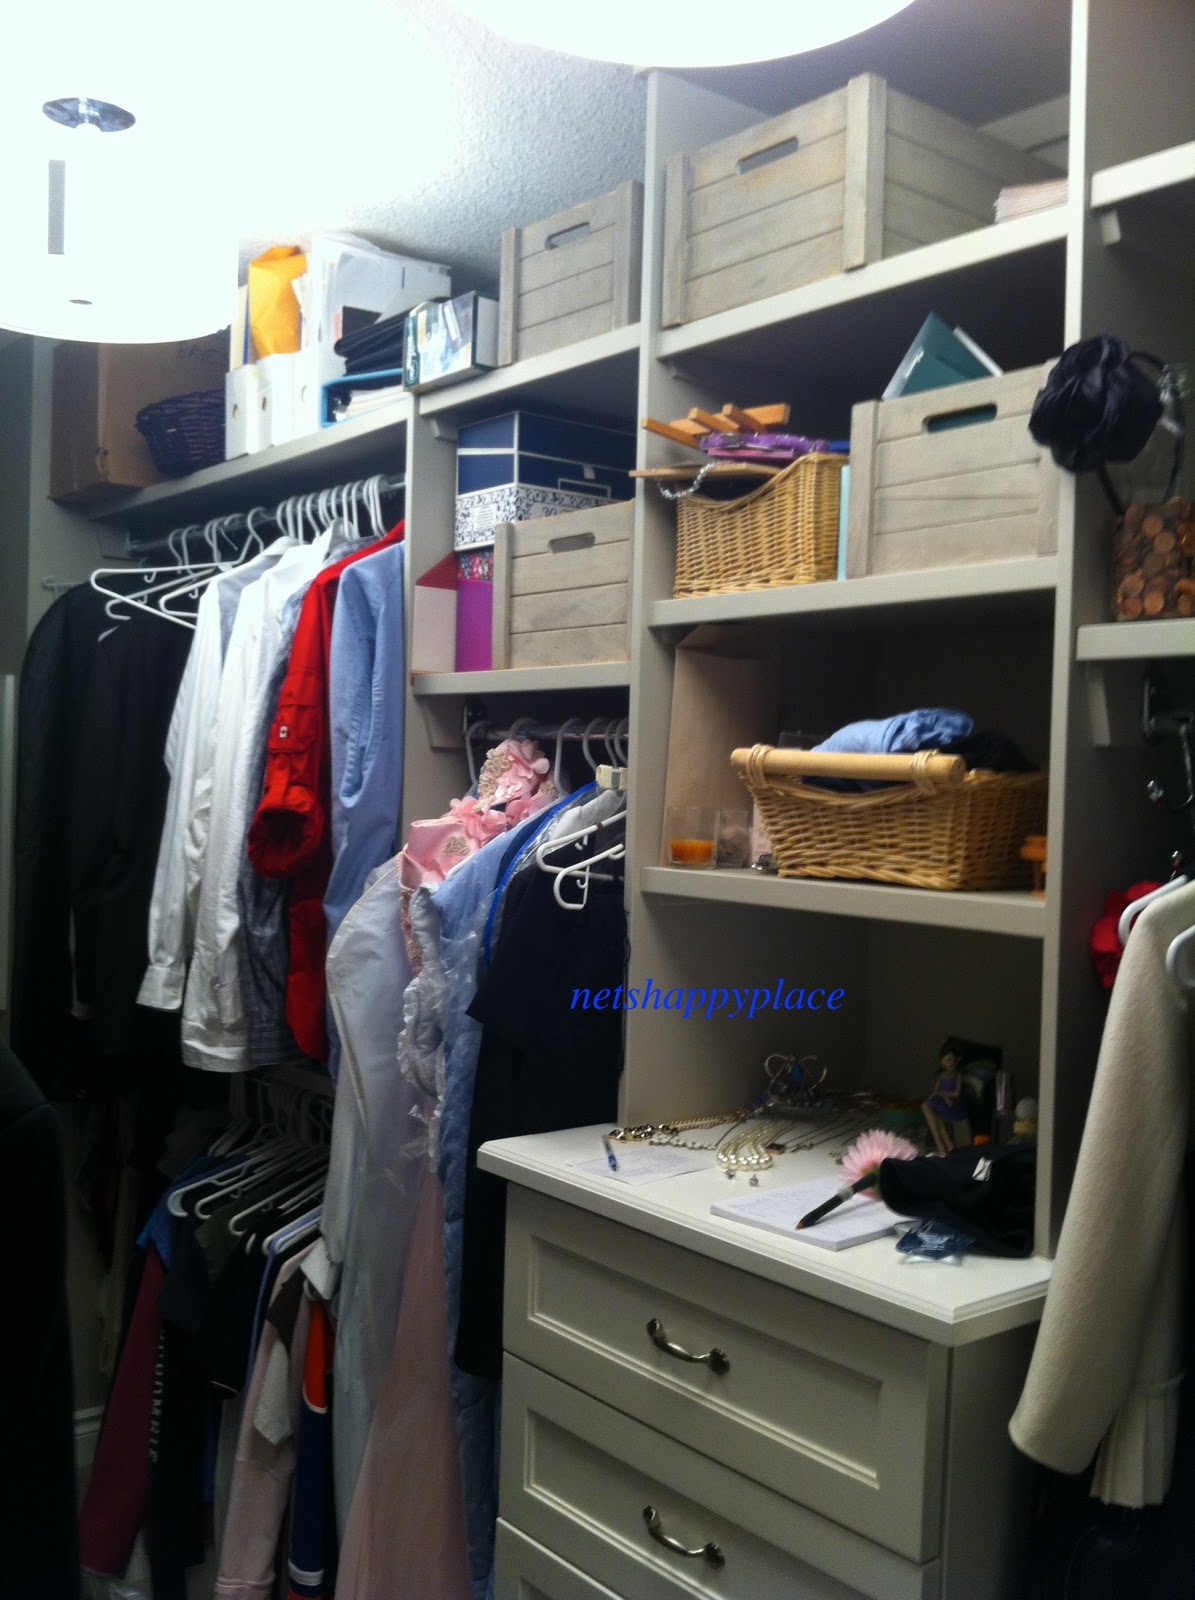
Here is my closet before...


We actually used some of these wooden boxes in the garage. (That is still a project in motion for organizing…)

AFTER


And lastly, my laundry room… OI! Hold onto your hats. The mess before may blow you away. 


Little bit of laundry, sewing, ironing, crafts, decorations, yup… it's all there.


I made this by copying clean & scentsible on the web. She inspired me to get my spring cleaning done!


Fabric Flower Tutoiral is here from Freckled Laundry.


Again, loved Jenn's soap idea and revisited the Cricket for the lettering.

$1 store containers…love it!

Easy access for kids to help with the clean up.

Now, as for that garage….

Until next time, Let's remember to be happy on our journey. =}


Wednesday, February 6, 2013

Girls Bedroom Make-over

I had a busy week with trying to finish up a bedroom that I had started earlier as well as holding a Valentine themed birthday party.

I gave some how-to's on painting stripes under my post "Oiler's Room". This is more of the chair rail detail.

I did use both blue and frog (green) tape on my project, and they were both great. (Better than my last tape, which was meant for protecting moulding from being painted) I would suggest getting to your painting the same day as you tape.The tape I put on the day before left me with some major touch ups due to peeling off my original base coat paint.

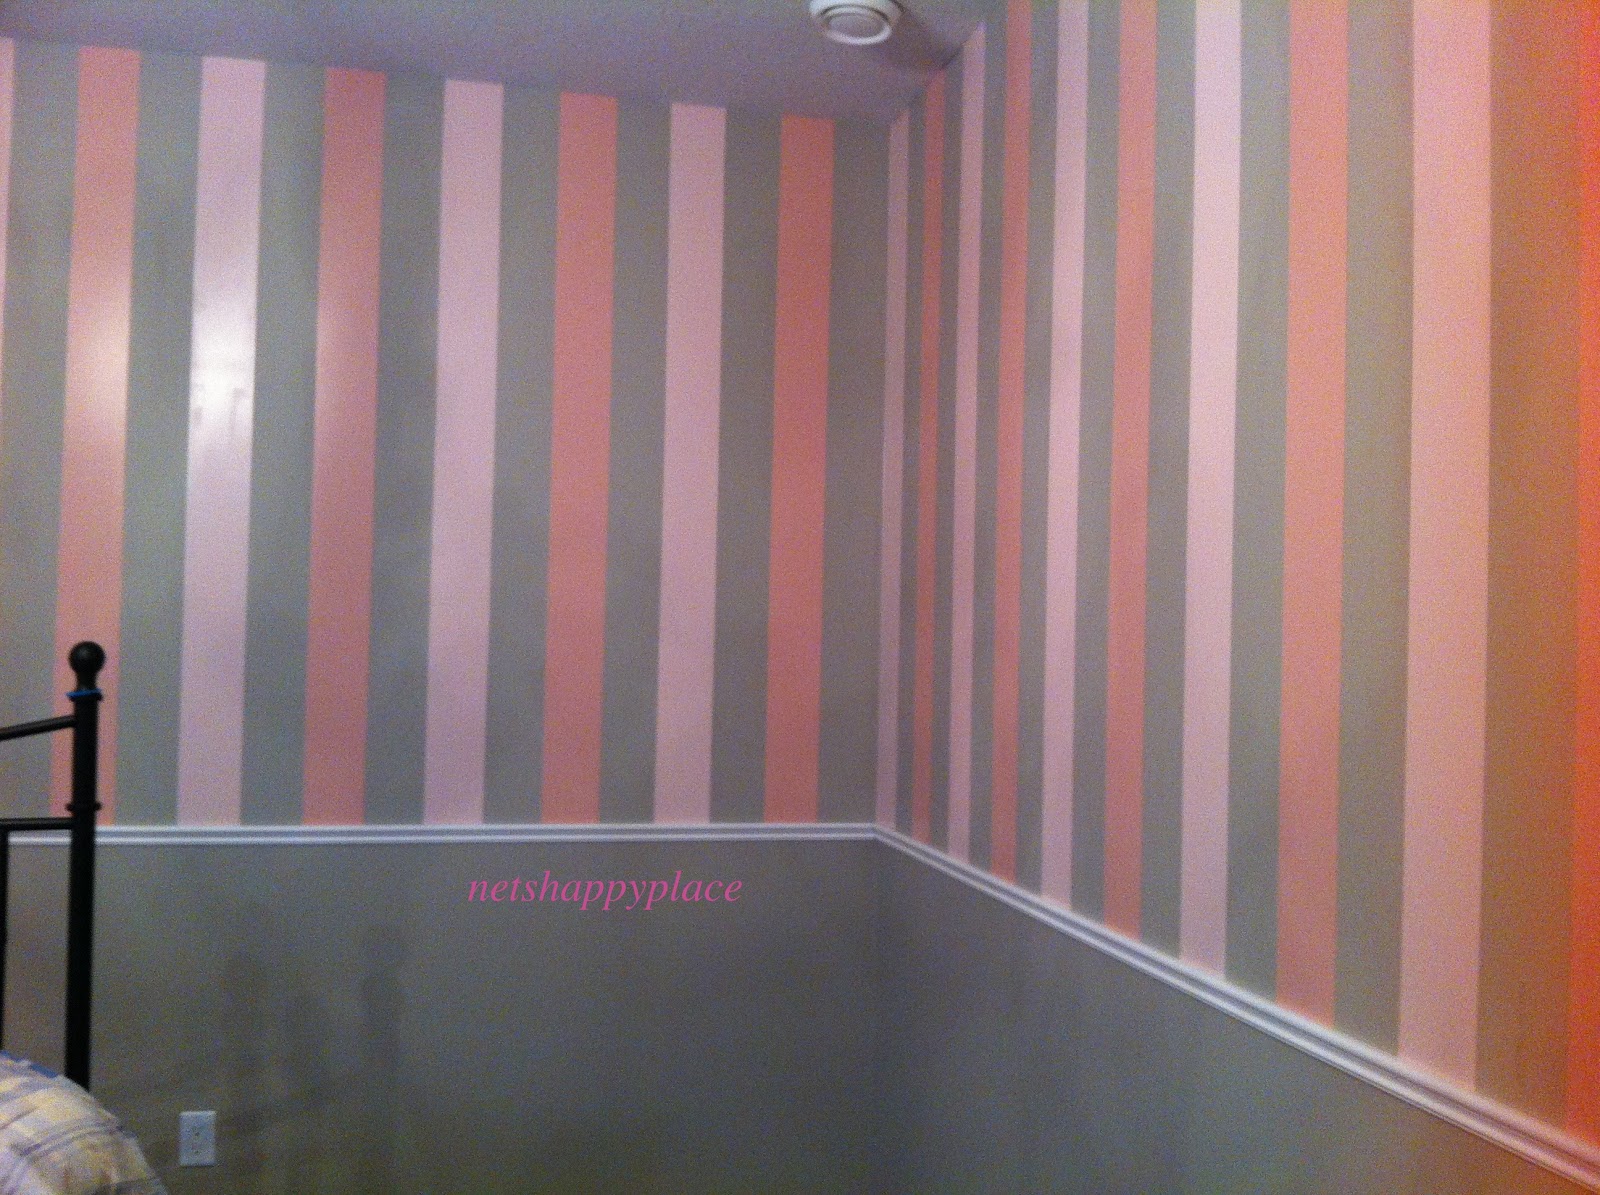
Measure your wall and find the centre. (including the wall above your doors). My stripe lines were 5" wide, so, after finding centre, I measured 2 1/2" on either side and made my mark. Work out from the centre. But begin your project in the farthest corner and work around the room.  (That way you can hide a mistake if one occurs) Using a pencil, mark which colour goes in each stripe. You will find your stripes will not be equal in the corners, I just left mine as they were. This made my pattern work all around the room.

Use your level. I bought a plastic one with a ruler mark on top. This resulted in no markings on the wall as I measured, and made marking of 5" spaces easy. With the help of Kevin, my hubby, we made a level line around the room for our chair rail. I used this for my guide: where to start my lines and stop painting.

A couple of days later we installed the chair rail, followed by the prefabricated faux wainscoting or shadow boxes. I found these at Home Depot for about $11 each.

Measure the perimeter of your room. I believe most moulding is sold in 8 feet pieces. Divide your perimeter inches by 8. That will determine how much chair moulding you'll need. Our daughter's room was 9' high. We did not follow the 32-40" chair rail guide or the 1/3 of the wall rule. I saw where her chair would hit the wall and made my mark! Plus, because her ceilings were so high, with the stripes going aallll the way up, a "proper" chair rail would have made the ceilings look way too tall and would have been too much stripe.

Using our saw, we cut our pieces at 45' angles for the corners. (Sometimes this angle had to be tweaked as the walls weren't exactly square).  Along the wall, when the piece wasn't long enough, cut both the end finishing and the end beginning in the same direction. Like this: \

Be prepared to purchase clear paintable caulking to caulk "inside, outside, upside down" your mouldings. (Quoting Berenstain Bears here…)

Measure from the longest part of your rail when marking. Find your line and gently ease your saw. When it matches up. Cut.


Me making this cut.


Our 45' angle.


Mark your studs so you'll know where to use the nail gun.

I used No Nails glue for the back of my moulding. With help, Kevin and I placed the moulding along our previously marked line on the wall. (Which was perfect because the line was already straight.)


Then the fun part- the nail gun. 


along the straight line…


Then the wainscoting. 


And finally, the (almost) finished room. (I still have some more nails to tap in, fill and touch up with paint.)


(This bright chandelier is a great addition to  this room)


Pictures at night don't do it any justice. It is so cozy and full of warmth. 

Good luck with your project!


Friday, January 25, 2013

Snowboard Jump

For our anniversary we headed to Banff, stayed in a sweet suite (hee hee) with a wood burning fireplace and had a wonderful time. We experienced fine dinning, (eating things I can't pronounce that came from all over the world and made my tummy ache), began cross country skiing with a friendly deer, but my bindings broke, and tried some tricks on our snowboards. You can laugh, but I don't want to see you laugh in front of me…. ;) We took a class and learned beginner rails and jumps.  Take a look!


Some other things that I am working on this week are: 

(sneak peeks below) 

1. My (second oldest) daughter's bedroom


2. A Valentine Birthday Party 


Stay tuned for some more painting stripe pointers, and some more birthday planning ideas.

On a more somber note...

Once again, sadness has fallen on our family with the passing of Brian's Dad. My late husband's father used to live with us. We spent a lot of time together in the past: family vacations, dinners, water fights, trips to the zoo, batting cages, go-carts, eating lots and lots of ice cream and frozen treats in their various forms, Mario Cart and numerous Wii games, book reading, joke telling, he even tolerated the girls putting bows in his hair and crazy make up on his face. (Which he would photo shop to look like he was beaten up) He had a great sense of humour, enjoyed cross word puzzles, loved to learn more about the sky, whether he was talking flying with Brian, reading the stars or studying up on space. He is greatly missed.


My Brian and his Daddy. Reunited in Heaven.


A Beautiful Life

I am trying to find peace, enjoy my life and be happy. I get hit hard with trials but I want to keep a positive perspective, a happy smile…this doesn't always happen, nor does it happen right away, but I am keeping busy and doing my best to live in the moment more and more. With the help of the Lord and through prayer, life goes from being endured to being enjoyable. Here are some pictures of living in the moment today and appreciateing the little things. 

Meringues from the Duchess. These are, as one of my best friends said today (and I hope she doesn't mind me quoting her), "Adult Cotton Candy". They melt in your mouth and then they are chewy. So addicting. What a talent to be able to make these treats that in turn make people like me happy.


These are the chocolate variety.


Some items I picked up at the Duchess. (Which I must say, they had just shut their doors and were kind enough to open them for me to run in and make my purchases quickly. Super fantastic.)


Here a few little items that I picked up at HomeSense to begin my Valentine Decor...


This little cutie sparkles with the sunshine.  My under $20 purchase. (I found another one similar online for $75)


Red is such a great front door colour...


Another little V-day purchase! 

And lastly..the French chocolate cookies. They were fantastique!


I hope you are all trying to find ways to "be happy in the journey!"


Monday, January 14, 2013

Oilers Room

Wow! I can't seem to keep myself busy enough. So in 2 days (with the help of my Mom, Dad , who fixed my level problem, and husband Kevin with the TV installation), we transformed our son's bedroom.

When doing lines…I realized my mistake and will try again when I attack my daughter's room. But in the end it looks pretty fabulous. He is happy and so far it is super clean.

I also found a fantastic room planner from Pottery Barn Kids.  Just type in the room measurements, the size of the furniture you have and what you plan on buying & play around with your look. Since we added furniture to his room, I wanted to be sure it wouldn't look out of place and over stuffed.


Use your level, and tape measure. Make your first line as straight as possible. My Mom and I  then measured up 1" from our first tape mark…all the way around the room. Were there adjustments? Oh, yes my friends. Was it work? Yup. Was it a lot to do in two days? Nope. Super duper fun. Did I learn what to do next time? Yes. My tape was not the correct one. (and you really should search the internet and not just rely heresy) Our first line was in dark green and the tape itself isn't a consistent width. The lighter green was. It peeled of nicely but apparently you should use the blue tape for doing stripes. Make note friends.

Also, of GREAT importance that I learned after I had peeled off the tape:

When you are doing stripes: place tape, then roller over all the tape in the colour of your back ground or current wall colour. This sets the tape and will prevent bleeding through.


Above is where we hung vinyl that Kevin's Mom & Dad had purchased for him. (This was really a big family project, wasn't it?) 


The final taping and picture frame placement.


My friends at my favourite store - Rona - mixed up some great paint from my jersey. Note - use paper samples, as fabrics are much harder to match. I left the codes for you friends out there who may want to do an Oiler's themed room.


The final painting with out removing the tape. Note - remove tape 1-2 hours after painting. We found that the paint rollers were much too wide and would have run into our next colour so my sweet hubby, Kevin purchase some sponge rollers for me. These were smaller and earlier to use.


The almost completed room.


We are waiting for new sheets and a duvet cover to arrive. We purchased a new duvet from Ikea. Nice and cool for him.


Some more vinyl from that same purchase. 


And…look up above! Now when he is resting he can contemplate what  Wayne Gretzky has said. "You miss 100% of the shots you never take." 


All the best in your future projects… Now what shall I work on next…?